Hey there! If you’re looking for a Google Analytics tutorial, you might be interested in my 100% Free Google Analytics Quickstart course – takes you through these steps as well as a few extra tweaks to make sure you’re setup for success!
So you have yourself a website. Congrats! Getting yourself a website is a huge step in the marketing your business game. You’re thinking: now what? Noooooooooooow – you set up Google Analytics! Why? Because this simple setup will let you see how many people are coming to your website, from where, how long they’re staying and much, much more.
Ready for Google Analytics? If those two words don’t make you want to party – I don’t know what will. Go ahead, grab your party hat, turn up the music, we’re going to super-ify your website with a Google Analytics setup.
(Looking for specific platform advice? Check out my ultimate guide to installing Google Analytics on any website here)
Step 1 – Sign Up!
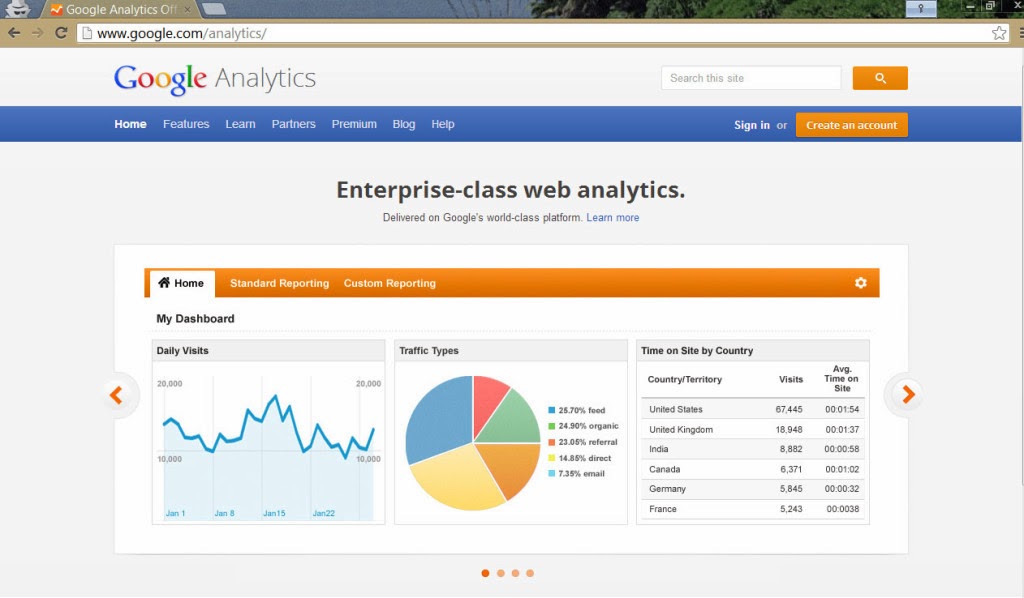
At this point either sign in with your existing Google account (Have you signed up for Google Apps for Business, perhaps? or do you currently use Google Adwords?) or click ‘Create an Account’ in the upper right.
If you’re not already signed in with a Google-related account, you’ll then see this screen:
Once you’ve signed up for a new account (if you need it), click the “Sign Up” button on the next screen:
Once you’ve signed up, you’ll come to the setup screen:
At the time of this post, Universal Analytics is currently in beta and doesn’t have the same full capabilities as Classic Analytics. I recommend choosing Classic Analytics to start (we can upgrade later once Universal Analytics is out of beta).
For Website Name, you can simply use your URL if you wish.
For Website URL – just type in your website address! Just as Google tells you – www.yourwebsiteadress.com (they’ve already taken care of the http://).
Industry – this one is optional but will let Google Analytics tailor some suggestions for your account for you. I’ve found most of these don’t apply to the clients I most often work with – if you’re having trouble picking one, I recommend “Online Communities.”
Pick your time zone.
For Account Name – feel free to use your company name. You can have/monitor multiple websites in one Analytics Account, so make sure this name will be appropriate if you plan on adding multiple websites.
Data Sharing Settings – completely optional. Select and deselect as you feel comfortable.
Click Get Tracking ID, agree to the pop-up Terms of Service and you’re all set!
Step 2 – Installing Tracking Code
This part can SEEM a little intimidating (I know it’s easy to go deer-in-headlights when anyone starts typing code-like characters) but I PROMISE it’s actually really simple.
Once you’ve signed up, you’ll see the following tracking code setup screen:
If you’re using WordPress to manage your site, simply install the Google Analytics for WordPress Plugin and under Settings, manually enter your UA code (just copy and paste everything after “Tracking ID” from your Google Analytics screen). NOTE: Be sure to copy and paste YOUR specific code and not the one in the above screenshot – each UA code is unique to one Google Account.
If you’re NOT using WordPress, installing the code is still pretty easy. Google walks you through it beginning with “What are you tracking?” Most likely you are tracking a single domain. From there scroll down and:
- Copy the code Google displays for you (it includes your unique UA code).
- Paste EXACTLY THAT before the ending tag in your HTML code.
QUICK TIP: Just do a search within the code to find this tag – “Ctrl+F” on a PC or “Command+F” on a Mac. In the Find box, type “</head>” (minus quotes) - Save. As Google says, Most websites re-use one file for common content, so it’s likely that you won’t have to place the code snippet on every single page of your website.
- and Done! Wait for Google to recognize the installed code (can take a few hours to one day). When everything is installed correctly – “Tracking Status” will read “Receiving Data.”
Step 3 – Add a Second Admin User
Your Google Analytics account is actually now set up and will start tracking data in the next 24 hours – this last step is just a bonus recommendation. By default, the address you signed up for is an admin user for Google Analytics (you have access to do everything in the account). I recommend setting up a second admin user with an unrelated Gmail address (free to sign up).
Why? Because as you may have experienced, Google is great with help forums but not so great at one-on-one customer service. You can’t really call anyone at Google if you lose access to your Analytics email account or something else goes funky. The data won’t be lost but you won’t be able to log in and see it [googling "can't access google analytics" will show you how many people have had this dreaded problem]. Having a second unrelated email address signed up with your account means having a back-up plan.
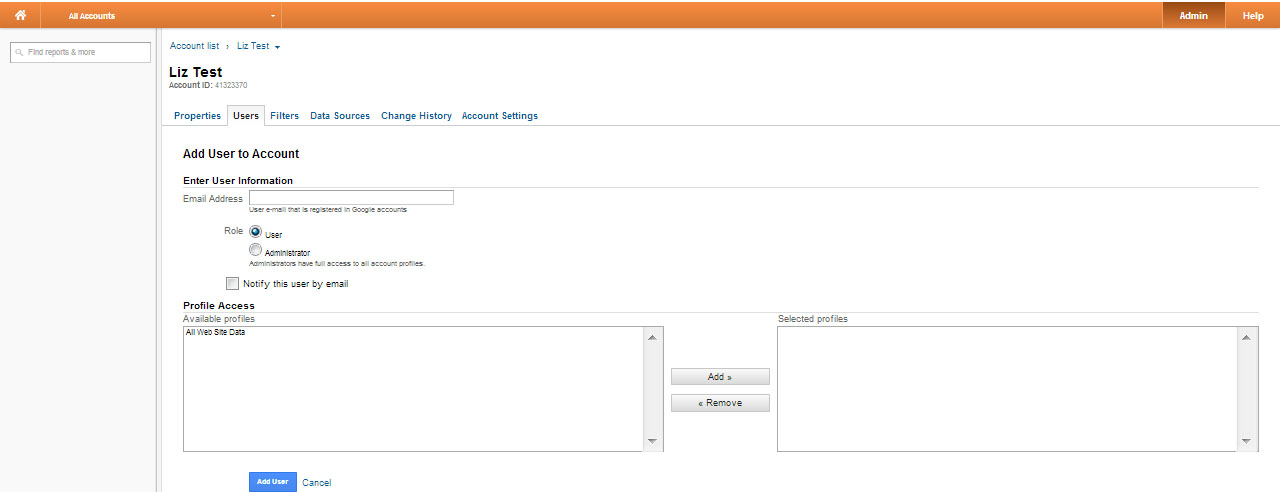
You can actually add users either at the Account level or Property level in Google Analytics. For our purposes, we’ll add someone at the account level.
So here’s how (super easy):
- When signed into Google Analytics, click on the Admin button on the orange bar
- Make sure you’re at the Account level and not Property or Profile. How to check this? Under the bolded Account name (in my screenshot, “Liz Test”), you should see “Account ID” versus “Property ID”. Not there? Quickest way to get there is to click the first account name after the “Account list” in the blue text at the very top of the screen – that should take you to your Accounts.
- Click the Users tab.
- Click +New User.
- On the next screen, fill out the email address (remember an unrelated Gmail address works) and select “Administrator” as the role.
- Check ‘notify this user by email’
- Select all of your profiles and click ‘add’ to give this user access.
- Click the blue Add User button.
- Log out of Analytics and try logging in with your second-user address. Did it work? Great! You’re done. If not – log in with your primary account info again and make sure the email address was entered correctly.
Here’s a screenshot of this step:
And done! You now have a Google Analytics Account set up and back-up administrative access in place. Enjoy finding out more about your visitors and what online marketing efforts (visitor source) are working for you!
Questions? Let me know in the comments below. I’d love to hear about how this blog post helped you.
If you liked this Analytics setup guide, great! Use the social sharing buttons at the top of this post to give this post some sharing love.


No comments:
Post a Comment